
Bicycle repair:
Introduction:
Bicycles are awesome companions, but sometimes they need a little TLC to keep rolling smoothly. Learning how to fix common bicycle issues can save you money and ensure you’re always ready for your next adventure. This guide is here to break down the basics of bicycle repair, making it easy for any cyclist to do it themselves. From simple checks to more hands-on fixes, we’ve got you covered.
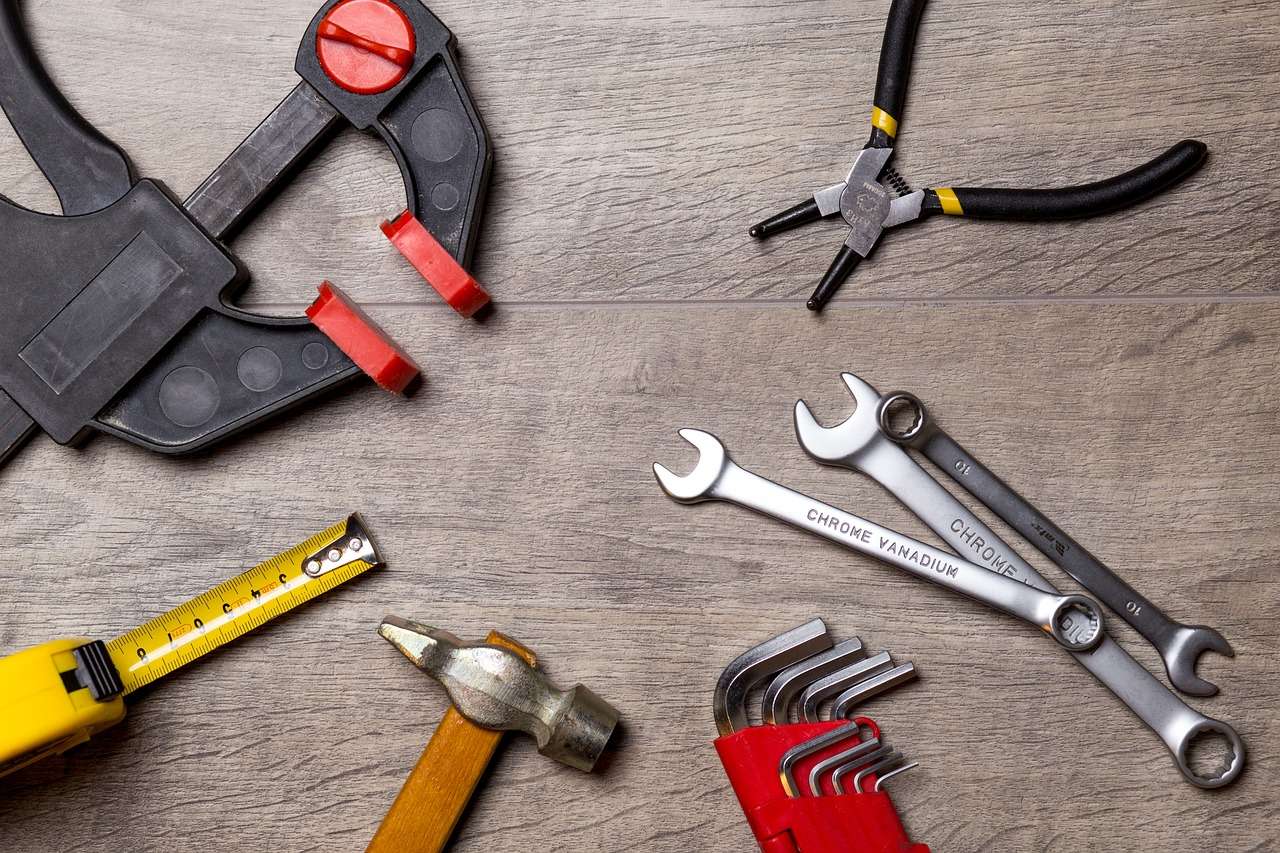
Essential Tools for Bicycle Repair :
To kick off your journey into DIY bicycle repair, you’ll need a well-rounded toolbox. Essential tools include Allen wrenches, screwdrivers, tire levers, a chain breaker, a pedal wrench, and a reliable floor pump. These basic tools cover a wide range of repairs, ensuring you’re prepared for various maintenance tasks.
Simple Maintenance Checks:
Keeping your bicycle in tip-top shape starts with regular maintenance checks. A quick visual inspection can reveal loose bolts, damaged cables, or worn-out components. Don’t forget to lubricate the chain and ensure your tires are properly inflated. These simple tasks not only prevent major issues but also contribute to a smoother and safer ride.
Dealing with a Flat Tire:
A flat tire is a common hiccup in a cyclist’s journey, but fear not – fixing it is a straightforward process. Start by removing the wheel, use tire levers to pop off the tire, identify the puncture, and either patch or replace the inner tube. Putting everything back together is as simple as it sounds. Learning this basic skill ensures that you won’t be stranded on the roadside, and you’ll be back pedaling in no time. You can repair your bicycles from this link http://facebook.com/wbbicycles
Adjusting Gears and Shifting:
Smooth gear shifting is the key to an enjoyable cycling experience. If your gears aren’t cooperating, a few adjustments can make a world of difference. Dive into the world of limit screws, cable tension, and indexing to ensure your gears work seamlessly. Understanding these basics empowers you to troubleshoot and fine-tune your bicycle’s shifting, enhancing your overall ride quality.
Brake Maintenance and Adjustment:
Brake maintenance is non-negotiable when it comes to rider safety. Regularly inspect your brake pads for wear, adjust cable tension, and confirm proper alignment. These simple steps guarantee responsive and reliable braking. Taking the time to understand your brakes’ mechanics ensures you can troubleshoot issues like a pro. Whether it’s aligning calipers or adjusting lever travel, maintaining your brakes becomes a straightforward task.
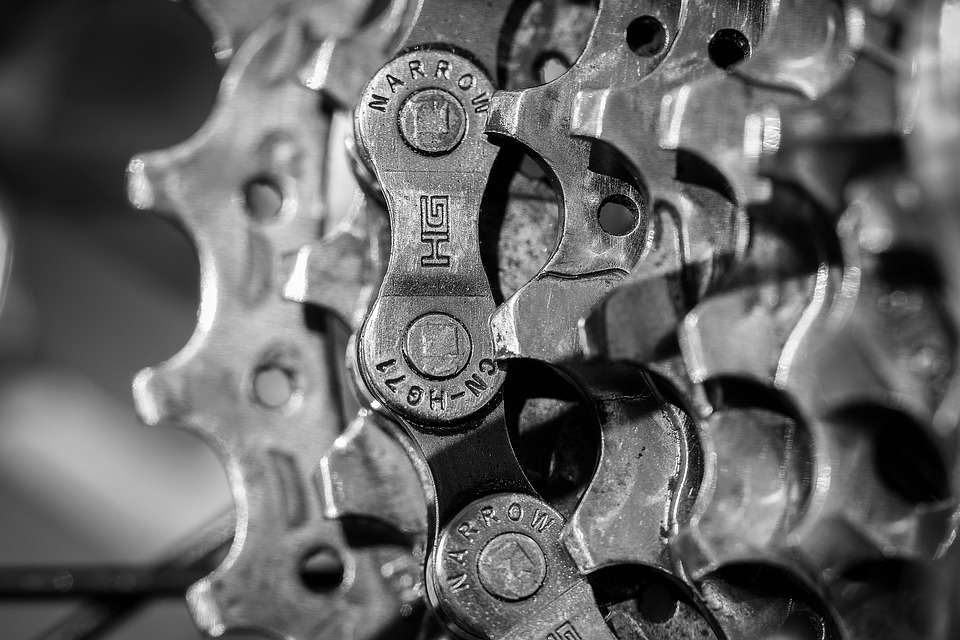
Chain Care and Replacement :
Your bicycle’s chain is a vital component, and a little care goes a long way. Regularly clean and lubricate the chain to ensure smooth pedaling and prevent premature wear. When it’s time for a replacement, familiarize yourself with chain wear indicators and use a chain tool for a hassle-free switch. You can visit http://wbbicycles.com for skilled technicians.
Wheel Truing and Spoke Replacement :
Wobbly wheels can be a nuisance, but with a spoke wrench and some patience, you can get them rolling straight again. Wheel truing, the process of adjusting spoke tension, is a handy skill for any cyclist. Additionally, understanding how to replace broken spokes ensures the structural integrity of your wheels.
Bottom Bracket and Crank-set Tips :
The bottom bracket and crank-set are at the heart of your bicycle’s power transfer. Regular checks for play or unusual sounds are crucial. Knowing how to remove and reinstall these components, along with correctly torquing the bolts, ensures a well-functioning drive-train. While it may seem a bit more advanced, understanding the basics of bottom bracket and crank-set maintenance gives you the confidence to address issues efficiently.
Suspension System Maintenance :
For cyclists with suspension systems, a little TLC ensures optimal performance. Regularly clean and lubricate fork stanchions and shock seals to maintain smooth operation. Adjust air pressure and damping settings based on your riding preferences. For those willing to go a step further, understanding the basics of suspension fork and shock servicing is beneficial.
When to Call in the Pros :
While this guide empowers you to tackle a variety of repairs, there are instances where professional help is advisable. Tasks like wheel building, hydraulic brake bleeding, and frame repairs may require specialized tools and expertise. Recognizing your limits and knowing when to seek assistance ensures that your bicycle receives the care it needs for more complex procedures.
Conclusion:
Taking charge of your bicycle’s maintenance through DIY repairs is not just about saving money; it’s about creating a deeper connection with your ride. Routine checks and simple fixes contribute to safer and more enjoyable cycling experiences. As you grow more confident in your repair skills, the satisfaction of being your bicycle’s mechanic enhances the overall joy of cycling. Armed with the knowledge from this guide, you’re well on your way to becoming a skilled DIY bicycle enthusiast. So, embrace the journey, pedal confidently, and relish the satisfaction of a well-maintained bicycle that’s always ready for the next adventure. Happy riding!
Frequently Asked Question(FAQs):
1. How often should I maintain my bicycle?
Perform basic pre ride checks regularly, including tire inflation and bolt inspections. Monthly, conduct a more thorough check with brake and gear adjustments. Consider a comprehensive tune-up every six months or after around 1,000 miles.
2. Can I use any lubricant for my bicycle chain?
It’s best to use a dedicated bicycle chain lubricant for optimal performance. These specialized lubricants withstand elements, reduce friction, and repel dirt. Choose the right lubricant based on your riding conditions.
3. When should I replace my brake pads?
Regularly inspect brake pads for wear, especially looking for wear indicators. Replace pads when they approach or reach the indicators. Also, replace pads if you notice reduced braking performance, noisy brakes, or visible damage.
4. What tire pressure should I use?
Follow the recommended tire pressure imprinted on the tire sidewall for optimal performance, grip, and safety. Underinflated tires increase rolling resistance and flats, while overinflated tires compromise traction and comfort. Check tire pressure regularly.
5. How do I fix a flat tire on the road?
Remove the wheel, locate the puncture, and use a tire lever to take off the tire. Patch or replace the inner tube, then reassemble the tire and wheel. Carry a portable tire repair kit for quick fixes on the road.